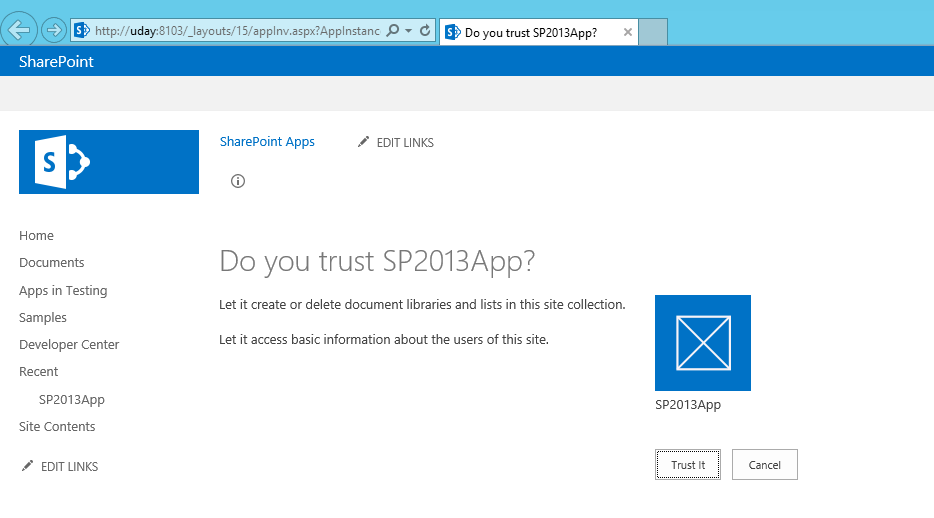
In my previous post, have shown how to deploy simple SharePoint app in hosted web apps.
Now i want to show how to Create, Read, Update and Delete operation on host web apps list.
I have created one list named it as "Associate" with 4 columns named as associate id(internal name Title), associate_name, associate_num, associate_address.

As we know, server side code is not allowed in SharePoint-hosted apps. So, we have to use client side object mode(JSOM/REST API)
1. Open visual studio 2013 --> Create new project --> Apps for SharePoint
2. Give a name for solution and click on OK.


3. Now go to pages folder and right click on it then add client web part call it as "CRUDOpps.aspx"
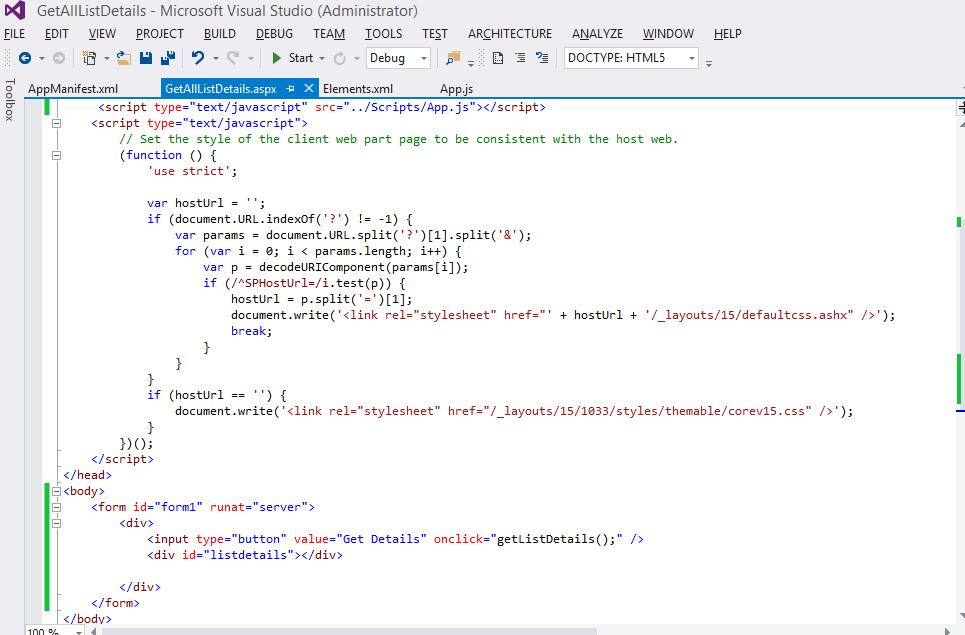
Now design the page as below,
<body>
<div>
<input id="btnGetList" onclick="associateList()" type="button" value="Get List" />
<div id="divList"> </div>
<div id="newitem" style="display: none">
<table>
<tbody>
<tr>
<td>Associate Id </td>
<td>:</td>
<td>
<input name="associateId" id="txtTitle" type="text" /></td>
</tr>
<tr>
<td>Associate Name </td>
<td>:</td>
<td>
<input name="associateName" id="txtName" type="text" /></td>
</tr>
<tr>
<td>Associate Number </td>
<td>:</td>
<td>
<input name="associateNumber" id="txtNumber" type="text" /></td>
</tr>
<tr>
<td>Associate Address </td>
<td>:</td>
<td>
<input name="associateAddress" id="txtAddress" type="text" /></td>
</tr>
<tr>
<td></td>
<td></td>
</tr>
<tr>
<td>
<div id="AddAssociate" style="display: none">
<input onclick="runSubmit()" type="button" id="btnAddSubmit" value="Add" />
</div>
</td>
<td>
<div id="UpdateAssociate" style="display: none">
<input onclick="runUpdate()" type="button" id="btnUpdate" value="Update" />
</div>
</td>
<td>
<input id="btnCancel" onclick="runCancel()" type="button"
value="cancel" /></td>
</tr>
</tbody>
</table>
</div>
</div>
</body>
4. Now open App.js from the Scripts folder and add the JavaScript code for performing CRUD operations on the CategoryList. There are some specific steps we need to implement for every operation:
We need to work with the App Web and Host Web URL. To do that the following helper method with querystring parameter will help us out:
function manageQueryStringParameter(paramToRetrieve) {
var params =
document.URL.split("?")[1].split("&");
var strParams = "";
for (var i = 0; i < params.length; i = i + 1) {
var singleParam = params[i].split("=");
if (singleParam[0] == paramToRetrieve) {
return singleParam[1];
}
}
}
5. Read list items
In the App.js declare variables to store the Host web and App web:
var hostWebUrl;
var appWebUrl;
Get the Host Web and App Web Url in document.ready:
hostWebUrl = decodeURIComponent(manageQueryStringParameter('SPHostUrl'));
appWebUrl = decodeURIComponent(manageQueryStringParameter('SPAppWebUrl'));
In the above code: SPHostUrl represents the full URL of the host site and SPAppWebUrl represents the full URL of the app web.
context = new SP.ClientContext(appWebUrl);
clientContext = new SP.AppContextSite(context, hostWebUrl);
These two statements are used to get context of App web and host web.
In CRUDOpps.aspx page we have added on button to get list of associate details when user click on the button it will display available associate details along with update and delete button for each row.
Add the following method in App.js to list of associate in host web.
function associateList() {
context = new SP.ClientContext(appWebUrl);
clientContext = new SP.AppContextSite(context, hostWebUrl);
list = clientContext.get_web().get_lists().getByTitle(listName);
var query = new SP.CamlQuery();
query.set_viewXml("");
listItems = list.getItems(query);
context.load(listItems);
context.executeQueryAsync(onSuccess,onFail);
}
Once the query is success, the below function will execute
function onSuccess() {
listItemEnumerator = listItems.getEnumerator();
output = "<table style=><tr><th>Associate Id</th><th>Associate Name</th><th>Associate Number</th><th>Associate Address</th></tr>";
while (listItemEnumerator.moveNext()) {
itemId = listItemEnumerator.get_current().get_id();
output = output + "<tr><td>" + listItemEnumerator.get_current().get_item('Title') + "</td><td> " + listItemEnumerator.get_current().get_item('associate_name') + "</td><td>" + listItemEnumerator.get_current().get_item('associate_num') + "</td><td>" + listItemEnumerator.get_current().get_item('associate_address') + " </td><td><input id='btnDelete' onclick='deleteItem(" + listItemEnumerator.get_current().get_id() + ")' type='button' value='delete'/></td><td><input id='btnUpdate'onclick='updateItem(" + listItemEnumerator.get_current().get_id() + ")' type='button' value='Update'/></td></tr>";
}
output = output + "</table><br/><input id='btnAdd' type='button' value='Add Associate' onclick='addnewItem()'/>";
$("#divList").html(output);
}
Fail method will be common for all failure calls
function onFail() {
alert('request failed');
}




Now i want to show how to Create, Read, Update and Delete operation on host web apps list.
I have created one list named it as "Associate" with 4 columns named as associate id(internal name Title), associate_name, associate_num, associate_address.
As we know, server side code is not allowed in SharePoint-hosted apps. So, we have to use client side object mode(JSOM/REST API)
1. Open visual studio 2013 --> Create new project --> Apps for SharePoint
2. Give a name for solution and click on OK.
3. Now go to pages folder and right click on it then add client web part call it as "CRUDOpps.aspx"
Now design the page as below,
<body>
<div>
<input id="btnGetList" onclick="associateList()" type="button" value="Get List" />
<div id="divList"> </div>
<div id="newitem" style="display: none">
<table>
<tbody>
<tr>
<td>Associate Id </td>
<td>:</td>
<td>
<input name="associateId" id="txtTitle" type="text" /></td>
</tr>
<tr>
<td>Associate Name </td>
<td>:</td>
<td>
<input name="associateName" id="txtName" type="text" /></td>
</tr>
<tr>
<td>Associate Number </td>
<td>:</td>
<td>
<input name="associateNumber" id="txtNumber" type="text" /></td>
</tr>
<tr>
<td>Associate Address </td>
<td>:</td>
<td>
<input name="associateAddress" id="txtAddress" type="text" /></td>
</tr>
<tr>
<td></td>
<td></td>
</tr>
<tr>
<td>
<div id="AddAssociate" style="display: none">
<input onclick="runSubmit()" type="button" id="btnAddSubmit" value="Add" />
</div>
</td>
<td>
<div id="UpdateAssociate" style="display: none">
<input onclick="runUpdate()" type="button" id="btnUpdate" value="Update" />
</div>
</td>
<td>
<input id="btnCancel" onclick="runCancel()" type="button"
value="cancel" /></td>
</tr>
</tbody>
</table>
</div>
</div>
</body>
4. Now open App.js from the Scripts folder and add the JavaScript code for performing CRUD operations on the CategoryList. There are some specific steps we need to implement for every operation:
We need to work with the App Web and Host Web URL. To do that the following helper method with querystring parameter will help us out:
function manageQueryStringParameter(paramToRetrieve) {
var params =
document.URL.split("?")[1].split("&");
var strParams = "";
for (var i = 0; i < params.length; i = i + 1) {
var singleParam = params[i].split("=");
if (singleParam[0] == paramToRetrieve) {
return singleParam[1];
}
}
}
5. Read list items
In the App.js declare variables to store the Host web and App web:
var hostWebUrl;
var appWebUrl;
Get the Host Web and App Web Url in document.ready:
hostWebUrl = decodeURIComponent(manageQueryStringParameter('SPHostUrl'));
appWebUrl = decodeURIComponent(manageQueryStringParameter('SPAppWebUrl'));
In the above code: SPHostUrl represents the full URL of the host site and SPAppWebUrl represents the full URL of the app web.
context = new SP.ClientContext(appWebUrl);
clientContext = new SP.AppContextSite(context, hostWebUrl);
These two statements are used to get context of App web and host web.
In CRUDOpps.aspx page we have added on button to get list of associate details when user click on the button it will display available associate details along with update and delete button for each row.
Add the following method in App.js to list of associate in host web.
function associateList() {
context = new SP.ClientContext(appWebUrl);
clientContext = new SP.AppContextSite(context, hostWebUrl);
list = clientContext.get_web().get_lists().getByTitle(listName);
var query = new SP.CamlQuery();
query.set_viewXml("");
listItems = list.getItems(query);
context.load(listItems);
context.executeQueryAsync(onSuccess,onFail);
}
Once the query is success, the below function will execute
function onSuccess() {
listItemEnumerator = listItems.getEnumerator();
output = "<table style=><tr><th>Associate Id</th><th>Associate Name</th><th>Associate Number</th><th>Associate Address</th></tr>";
while (listItemEnumerator.moveNext()) {
itemId = listItemEnumerator.get_current().get_id();
output = output + "<tr><td>" + listItemEnumerator.get_current().get_item('Title') + "</td><td> " + listItemEnumerator.get_current().get_item('associate_name') + "</td><td>" + listItemEnumerator.get_current().get_item('associate_num') + "</td><td>" + listItemEnumerator.get_current().get_item('associate_address') + " </td><td><input id='btnDelete' onclick='deleteItem(" + listItemEnumerator.get_current().get_id() + ")' type='button' value='delete'/></td><td><input id='btnUpdate'onclick='updateItem(" + listItemEnumerator.get_current().get_id() + ")' type='button' value='Update'/></td></tr>";
}
output = output + "</table><br/><input id='btnAdd' type='button' value='Add Associate' onclick='addnewItem()'/>";
$("#divList").html(output);
}
Fail method will be common for all failure calls
function onFail() {
alert('request failed');
}
After displaying all associates details, now you can update/ delete any associate details or you can add new associate details clicking on add associate button.
7. Create item in list
Add the following method in App.js to create a new associate details:
when you click on add associate button, will show add new associate form.
function addnewItem() {
$("#txtTitle").attr("value", "");
$("#txtName").attr("value", "");
$("#txtNumber").attr("value", "");
$("#txtAddress").attr("value", "");
$("#newitem").show();
$("#AddAssociate").show();
$("#UpdateAssociate").hide();
}
8. Update item in list
Here am using one method for add and update associate details
function operation(string) {
context = new SP.ClientContext(appWebUrl);
clientContext = new SP.AppContextSite(context, hostWebUrl);
list = clientContext.get_web().get_lists().getByTitle('associate');
if (string == 'update') {
listItem = list.getItemById(itemId);
parameter = 'updated';
}
else {
var listCreateInfo = new SP.ListItemCreationInformation();
listItem = list.addItem(listCreateInfo);
parameter = 'added';
}
if (($("#txtTitle").val() != "") && ($("#txtName").val() != "") && ($("#txtNumber").val() != "") && ($("#txtAddress").val() != "")) {
listItem.set_item('Title', $("#txtTitle").val());
listItem.set_item('associate_name', $("#txtName").val());
listItem.set_item('associate_num', $("#txtNumber").val());
listItem.set_item('associate_address', $("#txtAddress").val());
listItem.update();
context.load(listItem);
context.executeQueryAsync(onSuccessOfOperation,onFail);
}
else {
alert('Enter all the fields');
}
}
On success it will updated associate details on page.
function onSuccessOfOperation() {
if (parameter == 'added') {
alert('Item added to list');
parameter = "";
}
if (parameter == 'updated') {
alert('update complete');
}
if (parameter == 'deleted') {
alert('Item deleted');
}
addnewItem();
$("#newitem").hide();
associateList();
}
9. Delete item in list
Add the following method in App.js to update associate details based on ID.
function updateItem(a) {
itemId = a;
parameter = 'update';
context = new SP.ClientContext(appWebUrl);
clientContext = new SP.AppContextSite(context, hostWebUrl);
list = clientContext.get_web().get_lists().getByTitle(listName);
listItem = list.getItemById(itemId);
context.load(listItem);
context.executeQueryAsync(onUpdate,onFail);
}
function onUpdate() {
$("#newitem").show();
$("#AddAssociate").hide();
$("#UpdateAssociate").show();
$("#txtTitle").attr("value", listItem.get_item('Title'));
$("#txtName").attr("value", listItem.get_item('associate_name'));
$("#txtNumber").attr("value", listItem.get_item('associate_num'));
$("#txtAddress").attr("value", listItem.get_item('associate_address'));
}
In App.js add the below code to Delete associate details.
function deleteItem(itemId) {
parameter = 'deleted';
$("newitem").hide();
context = new SP.ClientContext(appWebUrl);
clientContext = new SP.AppContextSite(context, hostWebUrl);
list = clientContext.get_web().get_lists().getByTitle('associate');
var listItem = list.getItemById(itemId);
listItem.deleteObject();
context.executeQueryAsync(onSuccessOfOperation,onFail);
}
10. Since the App makes call to the SharePoint List, we need to set permission for the App to access list. To set these permissions, in the project double-click on AppManifest.xml and from the permission tab set the permissions as below:
11. Now i want to change client app title, description, width and height.
12. Now build the application deploy on developer site. Once you deploy on developer site now we will move the app to on working site.
13. Now open catalog site for the working site and upload CRUD Operations on List.app file in Apps for SharePoint.
14. Now follow my previous post to display app on a page.
15. After adding the app on page it looks like as below, by default it will show only one button.
16. Once user click on get list button, it will show list of available associate details
17. When user click on update button then it will show edit form for the respective associate.
18. Once user edit the details click on 'update'.
19. To add new associate details, then click on add associate button then enter details and click on add.
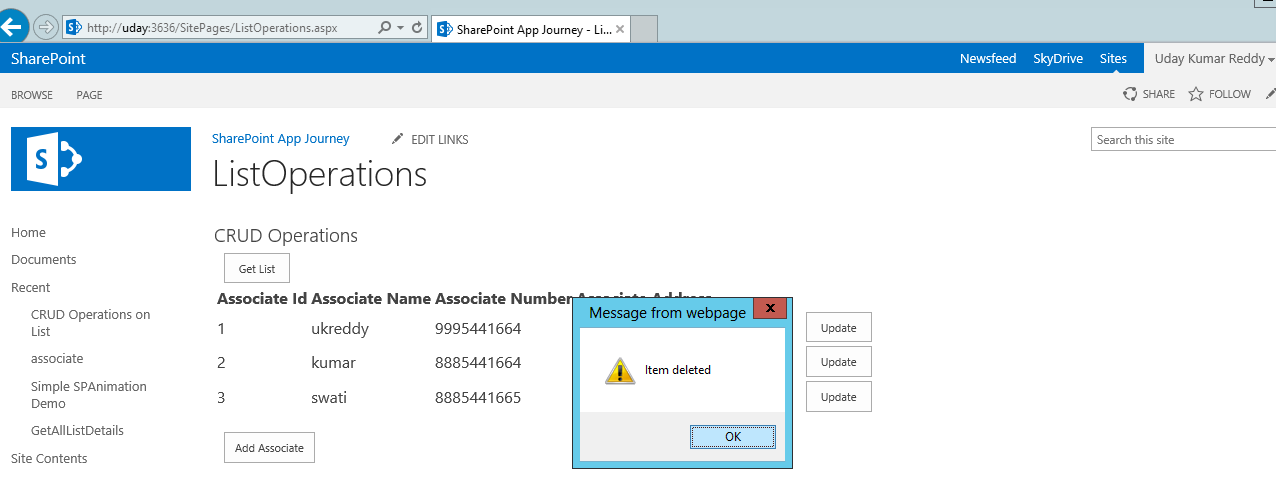
20. To delete any associate from list, click on delete of that associate.
After doing any operation the list automatically updates.
That is all about how to perform CRUD operations on list in SharePoint apps.
Please find the complete source code here.